
Featured
clutch kits parts
HELLRAISER Primary Clutch Kit (CFMOTO w/ CVTech Clutch)
HELLRAISER Primary Clutch Kit for CFMOTO CVTech clutch ONLY (NOT OmniDrive). Custom built for your riding style.
$169.99
Select Options  Authorized RNG DealerAuthorized RNG Performance Dealer· 2-3 day shipping from Cincinnati· Don't see your part? Call 513-458-9614
Published July 22, 2026
This guide covers installing an RNG Performance clutch kit on a CVTech-equipped CFMOTO CForce (400, 500, 600, 800, or 1000). If you have a 2024+ Gen 3 CForce 800/1000 with OmniDrive, the concept is the same but the tooling and kit differ, see the Gen 3 kit and OmniDrive tools instead. Not sure which clutch you have? Our clutch kit buyer's guide explains how to tell.
Set aside a couple of hours for your first install, work on a cool machine, and keep the sheaves clean throughout, no oil or grease belongs on the clutch faces.
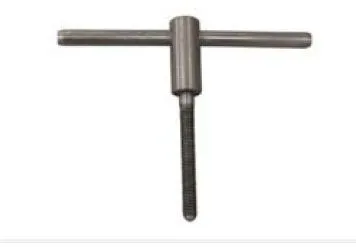
Park on level ground, set the brake, and let the machine cool. Remove the CVT cover bolts and lift the cover, noting the seal. Photograph the belt orientation (many belts are directional). Thread the secondary spreader into the driven clutch to release belt tension, then work the belt off the secondary and primary and set it aside.
Remove the primary clutch bolt and use the correct CFMOTO primary puller to draw the clutch off the crankshaft, do not pry it. On the bench, open the primary and replace the stock weights and spring with the RNG HELLRAISER components per the kit instructions for your machine and tire size. Keep everything clean, and reassemble with blue thread locker on the hardware. Reinstall the primary on the crank and torque the primary bolt to spec.
Pull the secondary clutch and use the spring compressor to safely disassemble it, the secondary spring is under tension, so do this carefully. Install your chosen Stingray Helix (SRM3 for all-around, SRM2/2-A for torque, R1 for speed) and the upgraded secondary spring if your kit includes one. Clock the helix and set the spring to the position RNG specifies for your setup, the kit or our team will tell you the exact clocking. Reassemble with blue thread locker and reinstall the secondary.
Spread the secondary again and route the belt over the primary and into the secondary, confirming the directional arrow points correctly. Release the spreader so the secondary clamps the belt, verify the belt is seated and not pinched, and reinstall the CVT cover with its seal. Torque the cover bolts evenly.
Whether the belt is new or reused, treat a fresh clutch setup to an easy 20-mile break-in, moderate throttle, varied speed, no hard launches, no deep mud or heavy loads. This seats everything and wears the glaze off a new belt so it grips fully. After break-in, your CForce should launch cleaner, pull harder, and run cooler. If anything feels off, slip, a burnt smell, or an odd shift point, call us at 330-806-0728 and we will help you dial it in.
clutch kits parts
HELLRAISER Primary Clutch Kit for CFMOTO CVTech clutch ONLY (NOT OmniDrive). Custom built for your riding style.

clutch kits parts
Stingray Helix for CFMOTO CVTech clutch ONLY (NOT OmniDrive). Choose your helix, SRM3, SRM2, SRM2-A, or R1.
clutch tools
Spreader tool for ALL year-model CFMOTO with CVTech secondary clutch.